There’s all sorts of terminal emulators available these days.
Most of the “modern” ones, like gnome-terminal for example, have lots of whiz-bang features like menu-driven customization, background picture or transparency, setting the font used, and so on.
The thing is, all these nice features introduce their own problems, the biggest one for me is BLOAT.
Gnome-terminal to me is like a monster, with an insatiable appetite for memory and CPU cycles.
I’ve had gnome-terminal using 66% CPU just sitting there looking at me, in an RDP session fer goodness sake! Unacceptable!
Anyway, Xterm is my current choice of terminals for use in RDP sessions (and for general-purpose use). It’s pretty lightweight compared to its KDE and Gnome cousins, and believe it or not it’s actually quite configurable.
Experienced Linux users and admins probably already know the charms of xterm, however I think from time to time it’s good to have a refreshed article, to show Linux newcomers or just basically people who never give xterm a second glance, that xterm is actually a very good (if not the best) terminal of choice ;)
Customize Xterm
If you use xterm in its default configuration, it usually looks plain, the scrollbar is on the left hand side, if there is a scrollbar by default (I prefer mine on the right hand side), and the font is usually not very nice looking and also quite small.
I reckon a lot of people just look at it and say “meh!” and bring up gnome-terminal instead when they see that.
However, even Xterm has various menus to customize its appearance. By pressing the CTRL key with a combination of the Left, Middle, or Right mouse keys, you can alter xterm’s appearance and behaviour…
Whilst useful, these changes don’t automatically get saved, and are therefore relevant only to that particular running xterm instance. There is however a way to customize and make the changes permanent.
1) Customizing Xterm
Introducing the .Xresources file.
Using this handy file, which you save in your home directory, you just plug in whatever you wish to customize your xterm sessions with.
Here’s my current .Xresources file contents…
! Use a nice truetype font and size by default...
xterm*faceName: DejaVu Sans Mono Book
xterm*faceSize: 11

! Every shell is a login shell by default (for inclusion of all necessary environment variables)
xterm*loginshell: true

! I like a LOT of scrollback...
xterm*savelines: 16384

! double-click to select whole URLs :D
xterm*charClass: 33:48,36-47:48,58-59:48,61:48,63-64:48,95:48,126:48

! DOS-box colours...
xterm*foreground: rgb:a8/a8/a8
xterm*background: rgb:00/00/00
xterm*color0: rgb:00/00/00
xterm*color1: rgb:a8/00/00
xterm*color2: rgb:00/a8/00
xterm*color3: rgb:a8/54/00
xterm*color4: rgb:00/00/a8
xterm*color5: rgb:a8/00/a8
xterm*color6: rgb:00/a8/a8
xterm*color7: rgb:a8/a8/a8
xterm*color8: rgb:54/54/54
xterm*color9: rgb:fc/54/54
xterm*color10: rgb:54/fc/54
xterm*color11: rgb:fc/fc/54
xterm*color12: rgb:54/54/fc
xterm*color13: rgb:fc/54/fc
xterm*color14: rgb:54/fc/fc
xterm*color15: rgb:fc/fc/fc

! right hand side scrollbar...
xterm*rightScrollBar: true
xterm*ScrollBar: true

! stop output to terminal from jumping down to bottom of scroll again
xterm*scrollTtyOutput: false
Note that comments start with a “!”.
Copy and paste that into a file called .Xresources in your home directory.
Then issue the following command;
xrdb -merge ~/.Xresources
That will tell your X server to incorporate those tweaks, and saves having to log out and back in again.
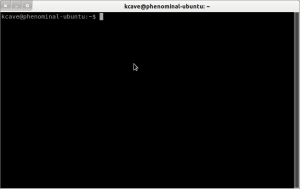
Then run a new xterm and it’ll look like this;
Which in my opinion looks much nicer than the distro-supplied defaults. Also, one of the tweaks above will get Xterm to select whole URL’s displayed in the xterm window, which is a very handy feature. And I’ve selected DosBox-like screen coloring, which I find quite nice.
2) Cutting and pasting with Xterm
Cutting text with xterm is pretty much the same as with gnome terminal. The difference being that any text you select, automatically gets placed into the clipboard.
- Drag the mouse cursor along the text you wish to copy whilst holding down the LEFT mouse button.
- double-clicking on a word will select that word (or if you’ve included my tweaks it’ll select a whole URL)
- triple-clicking on a line will select that line
Pasting text is also pretty straightforward; just click the MIDDLE mouse button into an xterm window and the text in the clipboard will be pasted in.
3) Scrolling using the mouse
- LEFT clicking on the scrollbar scrolls DOWN a bit
- MIDDLE clicking and HOLDING on the scrollbar drags the scroll window up and down
- RIGHT clicking scrolls UP a bit
There are a bazillion other tweaks which can be performed using this method. I’ll update this article when I find new hotness for xterm.
Do you have any additional tweaks for Xterm or an opinion on your favourite terminal of choice?
Post them in the comments below!
Customize Xterm, the original and best terminal...,


Leave a Reply