
This will be a multi-part series on SSH
This is Part 1
Say you have a workstation or server, safely sitting behind a firewall, but you need access, for example, to the shiny RDP service you installed not so long ago, and/or other services on that system.
You could easily forward the RDP port (3389) or other ports on that system to the raw internet, but that’s just asking for trouble. It’d be best to hide away most of your services behind firewall rules, and gain access to them in a secure way. This is what SSH can achieve for you, and much more! So read on to find out how all this magic can be achieved!
Preamble
- I’m assuming your target machine is behind some kind of firewall, a router of some kind – whatever hides your local network from the raw Internet. If your setup is not like that, you should do it, as you’re exposing your system(s) to all sorts of attacks by not-so-nice people out there who’d like nothing better than to infiltrate your systems, steal your data, and use your system resources for their own nefarious purposes.
- My target server/system is running 64-bit Debian Wheezy – all the stuff written here will be valid for just about all Linux systems running openssh though.
- We will create a ssh keypair and will password protect it – this will become very handy as then we’ll be able to disable the password prompt on the ssh server.
- I’ll show you how to install and use fail2ban, to help detect when script kiddies try to run brute force attacks against your system and block them automatically.
- I show how to use puTTY on Microsoft Windows to perform the same tasks which can be done from a Linux ssh client system.
Read on to find out! …
In The Beginning…
What is SSH?
SSH stands for Secure SHell.
In the beginning, there was telnet, which enabled users to connect and log in to another machine on a network remotely. Telnet was great in those halcyon days of the early internet and ARPANet, when life was pure and simple and there were next to zero script kiddies snooping on your data and login details. Telnet is a very basic, plaintext connection. If you start a traffic sniffer utility such as Wireshark and listen in when someone connects to another machine on the network, you can gain their login name, and password, and all the interaction that user performs on that system. Telnet is unsecure.
What was needed eventually, was a way to remotely connect to a machine, and do so in a way that is scrambled so that all anyone eavesdropping on your session would see is seemingly random rubbish.
And so SSH came into being. It really rather useful, as we shall see, and learn to use in this article.
I had this article in draft form for a few months and due to a serious lack of time and other priorities, never completed it. Then recently there was a post on Slashdot with a link to what purported to be some kind of Ultimate Guide to SSH, so I was kind of slapping myself on the head at that point, thinking I was beaten to the post. But I was relieved when I read the article in question, as in my opinion it was quite shallow and didn’t particularly say anything really useful. This one, I hope, will give additional and more useful real life case info, so let’s get started.
0) Article Index – Jump to the sections you’re interested in ;)
- 5) puTTY on Microsoft Windows
- i) Installing puTTY
- ii) Creating a private/public ssh keypair on puTTY
- iii) Configure a a basic puTTY connection to your target ssh server
- iv) Add the puTTY public key to the user’s authorized_keys file
- v) Testing the puTTY public key, before locking down the ssh server
- vi) Importing your Linux-created private ssh key to puTTY
1) Install the SSH Server on your target machine.
You may or may not already have the SSH Server installed on your target system. If you don’t, do so now. On debian based systems it’s done this way;
sudo apt-get install openssh-server
Non-Debian systems will have their own package manager (or not). I’m not going to cover those ;)
The ssh server on the target machine should automatically start up now and we should be able to ssh to it. By default it should prompt for a login password.
Let’s try that now…
ssh <yourusername@target-machine-ip-address>
In my case, my target machine is my VM so I use ssh kcave@192.168.1.254 …

SSH server is working.
So far so good. However, it’s not such a good idea to have SSH prompt for a password, as this allows random people and script-kiddies to attempt to log into your machine, trying out different username/password combinations to see if they can get in. And we don’t want that :) , so, we’ll do a few things to change that.
In order to do that, we’ll need a SSH public and private key…
Jump Back To Index
2) Create a SSH private/public key pair…
SSH keys are wonderful things. They’ll allow us to connect to our ssh server without having to enter a password when connecting to it, amongst other things.
At this point you have a choice – you can either create an ssh key pair which is protected by a password, or without.
Without a password:
PROS: You don’t have to worry about remembering and entering a password to gain use of the key.
CONS: If someone obtains access to your key pair, they will be able to access all systems that know your key.
With a password:
PROS: Even if someone manages to get a hold of your keys, they won’t be able to use them without knowing your password – very secure.
CONS: If you forget your password, forget ever using that key again – you’ll have to replace it with a new key and also remove the old keys from your system and supply it with new ones.
There are various reasons as to why you would want to generate keys with or without passwords. Passwordless keys would normally be used for automated tasks, like for example if you had a timed task on one system which logs into a target system, performs a database backup, copies the backup to the originating system. In this case, you would generate a passwordless ssh keypair and would severely limit the commands that particular key could execute to perform a particular task.
Password protected keys would typically be used if you or a user wish to log into a server and perform tasks in an interactive terminal, create ssh tunnels etc. which I’ll cover later in this article.
For now, I am going to generate a password protected ssh key pair. This is done by issuing the ssh-keygen command…
ssh-keygen -t rsa -f ~/.ssh/id_rsa.example -C "Example SSH Key"

Generating SSH Keys WIth Password
-t rsa specifies the type of key to be generated.
-f ~/.ssh/id_rsa.example specifies the filename of the generated key. The default is id_rsa(.pub for the public key). I chose a different name, as this will allow us later to do something cool and use multiple keys for different purposes.
-C "Example SSH Key" specifies a Comment for the generated key – this will remind us of the purpose of each key we generate.
The utility asked me to enter a passphrase, which I did. I’ll try to remember it ;)
The utility then generates the key as specified, prints out the hex fingerprint and some fancy ASCII art fingerprint as well for good measure.

SSH Keys created
I changed to my .ssh directory and took a listing.
ssh-keygen created two files;
id_rsa.example is the private key. Do not let this fall into enemy hands. Keep it safe – even if it is protected by a password.
id_rsa.example.pub is the public key. This is the key which needs to be transferred to your target machine.
Jump Back To Index
3) Copy the public key over to the target system…
There’s a neat command called ssh-copy-id which does this. And for our newly generated key, the command goes like this;
ssh-copy-id -i ~/.ssh/<key filename>.pub <username>@<target machine address>
For my setup, this translates to the command
ssh-copy-id -i ~/.ssh/id_rsa.example.pub kcave@192.168.1.254
You’ll be asked for your password for your user account at the target system. Once correctly put in, the public key will be placed on the target system in the file ~/.ssh/authorized_keys
Jump Back To Index
4) Test connecting to the target system via ssh key…
So, your target machine now knows your public ssh key. Your user on the target system has a file called authorized_keys which contains that public key you just gave it.
At the moment, we’re working with a default ssh configuration on the target machine – it’ll show a password prompt if you ssh to it. So how can we test the public key we just gave it?
Easy – we use the ssh-add command on our client machine, to add our private key to the client system’s ssh key authentication agent’s database. Here’s the command in action;
ssh-add ~/.ssh/id_rsa.example
Note how we specify the private key and not the public one for this – the public key is the one which is given to the target system and the target system uses that public key to compare against the private key we’re using.

ssh-add
If your private key is password protected, it’ll ask you for the password you used when you generated the key earlier – I hope you remembered it ;) Enter the password now and if correct your private key will be added to the authentication agent.

ssh-add -L command
We can verify the authentication agent has the key now, by using the command ssh-add -L
This will show the key we added to it.
Now ssh to your target system;
ssh kcave@192.168.1.254
Instead of prompting you for a password, your system should now just let you in! Congratulations, you now have passwordless login via ssh (as long as you added the password-protected ssh key to your authentication agent).
HOWEVER – if you’re performing this operation from Gnome Shell, a window WILL pop up and ask you for the private key password – even though the authentication agent already knows it.
This, is an Annoying Feature.
4a) Prevent Gnome desktop asking you your private key password, even if you’ve already added it to the ssh authentication agent!
Gnome 3 automatically looks in ~/.ssh for ssh public keys, and is very “helpfully” ignoring what’s already been added to the authetication agent.
Dear Gnome developers; WHY!?
If you’re like me, you despise Annoying Features like this.
There’s an easy way around this.
Simply create another directory within ~/.ssh – I call mine ~/.ssh/keys for example.
mkdir ~/.ssh/keys
Then move the keys into that directory…
mv ~/.ssh/id_rsa.example* ~/.ssh/keys/

keys directory
Then next time, just use ssh-add ~/.ssh/keys/id_rsa.example , to add the key to the ssh authentication agent. Et voilà! Gnome no longer prompts you for the password.
Jump Back To Index
5) puTTY on Microsoft Windows
This is a good stage in the article to describe how to configure and use puTTY on Windows. puTTY is a telnet and ssh client for Windows systems. It’s very, very good, and best of all, it’s free – what’s not to like? :)
If you haven’t already done so, install puTTY now. If you already have it , you can skip this part…
i) Download and install puTTY
You can obtain puTTY for free from the puTTY site here. I personally prefer to download the Installer package instead of the individual utilities. Just click through all the defaults – they’re safe and pretty standard.
ii) Generating a public/private key

PuTTYgen
This is achieved via use of the puTTYgen utility, included with the Windows installer I mentioned above.
What we need is to generate a SSH-2 RSA key. I also recommend you change the “Number of bits in generated key” to 2048. Click on “Generate” to create a key.

Generating a key
Once you hit Generate, puTTYgen sets about creating a key. As it instructs, you should move the mouse cursor randomly around the window during this process – this increases the randomness of the key being generated.

Generated key
Once the key has been generated, you should enter a relevant comment in the Key Comment box.
At this point, you can also give the key a password to protect it. I’ve given mine a password, just as I did with the key I generated with Linux, earlier.

Saving the private key
Click on “Save private key“. It’ll be saved with a .PPK extension, as it’s in a format for use by puTTY.

SelePublic OpenSSH Key: Select all text inside the text box and copy it to the clipboard
Notice the text box entitled “Public key for pasting into OpenSSH authorized_keys file“.
This, weirdly enough, contains the public key, in a format suitable for the openssh authorized_keys file.
Keep the puTTYgen window open for now – we’ll need to copy and paste that text into the authorized_keys file in a moment.
In order to do that, we first need to log into the target ssh server via puTTY…
Jump Back To Index
iii) Configure a basic puTTY connection to your target ssh server
Start the main puTTY program.

puTTY Window
Enter the ssh server target’s IP address in the “Host name or IP Address” box.

puTTY Appearance settings
At this point, I like to change the font puTTY uses, to something a bit more palatable than the default Courier New, so I select the Appearance link under “Window” in the left hand side options list, click on “Change” for the font, then choose Lucida Console 12-point.

puTTY Save settings
Clicking the “Session” item list on the left again brings us back to where we input the ssh target server’s IP address.
We can save this configuration for later use, by entering a name in the text box under “Saved Sessions” and clicking on “Save”.
You should do this now, because we’re going to use it again in a bit.
Next, click “Open” at the bottom right hand corner. This will attempt to connect to the ssh target server…
puTTY opens up a console window.

puTTY Security Alert Window
If this is the first time puTTY has connected with the server, it’ll pop up a Security Alert window and ask you what to do next.
I’ll click on “Yes”, to add the server’s key to the puTTY key cache, since I know for sure I’m connecting to the intended target server…

puTTY Login Successful
You’ll be prompted for your login and password details, and if those are valid, the ssh target server will let you in.
Jump Back To Index
iv) Add the puTTY public key to the user’s authorized_keys file

Edit the authorized_keys file
We need to copy and paste the OpenSSH version of the public key, which puTTYgen has created for us and conveniently placed in a text box for us to copy from.
Select ALL the text in that text box now, and copy it to the clipboard.
Then, in the ssh session which you should still be in, type ; vi .ssh/authorized_keys

authorized_keys file editing with vi
If there’s already a public key in that file, then don’t be fazed – that’s a file from the Linux section I created earlier, and I want to keep that.
Just leave the cursor there, and press SHIFT-O. The vi editor will “push” the current line down, and is now in INSERT mode.

Copy puTTY public key
On the puTTYgen window, select ALL the text in the text box entitled “Public key for pasting into OpenSSH authorized_keys file, then right-click and select COPY.

authorized_keys file with puTTY key pasted in
Go back to the puTTY ssh session with the vi utility which is currently editing the authorized_keys file, and RIGHT-CLICK into it.
The puTTY openssh public key should now be pasted into the authorized_keys file.
Press the ESCAPE key – this will take vi out of INSERT mode.

write the file and quit VI
Finally, type “:wq” (without the quotes), which will write the file to disk, and then quit the Vi editor. You now have the puTTY public key saved to your user’s authorized_keys file on the target ssh machine.
Jump Back To Index
v) Testing the puTTY public key using Pageant, before locking down the ssh server…
Even though the ssh server target system still currently accepts passwords, we can test the public key by adding the puTTY private key to puTTY’s authentication agent, which is called Pageant.

Pageant Menu
Start Pageant from the Windows start menu, it’ll be under the PuTTY sub-menu.
Pageant Icon
A rather unremarkable icon will appear in the WIndows systray.

Right-click on the Pageant icon and select Add Key

Select Private Keyfile
Select the private ssh keyfile you generated earlier

Enter Private Key Password
If you password protected the keyfile, then you’ll be prompted to enter it now.

Click View Keys

Pageant Key List
You can see any private keys which have been added to Pageant by clicking on View Keys in the Pageant menu
Okay so looks like the private key is now added to the authentication agent. Time to test the connection, using the connection details you hopefully saved earlier like I suggested you should ;)

Select Saved Connection Straight From Pageant Menu
The nice thing about Pageant, is that it knows about any sessions you saved with puTTY.
Right click on the Pageant icon and move the mouse over Saved Sessions. Then select the session you saved earlier.

PuTTY Logs Straight In
Because we just made a very basic connection configuration earlier, the ssh server will prompt for a login name, so enter the username.
Success! Pageant passes the private key details to the target ssh server, and because the corresponding public key is in the authorized_keys file, the server allows the login.
We can further automate the login by editing the saved Session configuration and entering the username…

Edit Saved Session
Open puTTY and select the saved session and click on Load

Enter auto login username
Click on “Data” from the list on the left hand side.
Enter the username in the text box next to “Auto login username”

Save Edited Session
After entering the desired username, click on “Session” in the list on the left hand side again.
Then click on Save. From now on, when you load that session, and if you have the private key loaded into Pageant, you’ll be logged straight into the ssh target server without being prompted for a username.
I’ll show you how to configure port forwarding/tunnelling further down in the article. Just one last part on puTTY and private keys, which may be useful to you…
Jump Back To Index
vi) Importing your Linux-created private ssh key for use by puTTY
If you’re like me, sometimes you use Linux and sometimes you use Windows. It can get cumbersome creating keys for linux and Windows use, so why not just use the one private key for both?
This is entirely possible. You can import an openssh (Linux) private key and convert it to a puTTY-style ssh key. Here’s how…
First of all, copy the private ssh key from your Linux-based client system – in the earlier section for Linux in this article, I called mine ~/.ssh/id_rsa.example – and save this key to a place where you will be able to access it from Windows – remember to not give others access to the private key! It’s called private for a reason ;)
PuTTYgen
Next, in WIndows, load up our old firend puTTYgen.
Click on “Conversions” from the top menu bar, then click on “Import Key”.
Select the openssh key private key file you copied from your linux client system.

Enter password for openssh private key
If the openssh private key is password protected, you’ll be prompted for that password. Enter it now.

Openssh key now in puTTYgen
puTTYgen has now imported the openssh private key.
You can now click on Save private key, and puTTYgen will save it as a .PPK file for use with Pageant and puTTY.
Before saving it you can change the password for the key, it’s up to you.

Saving imported openssh private key as puTTY private keyfile
Then you can load that private key into Pageant as before.
The beauty of this is that you now can use the same public key in the authorized_keys, as the Linux-generated one.
One last thing – Delete the openssh private key, and KEEP YOUR PUTTY PRIVATE KEYS SAFE FROM THEFT!
And that’s it for key generation on linux and Windows. Now it’s time to lock down the ssh server a bit..
Jump Back To Index
6) Configure and lock down the SSH server/target machine
So far we’ve installed the ssh server on the target machine, created an ssh keypair, transferred the public key to that machine, and have sucessfully logged in.
It’s now time to edit the configuration file for the ssh server, to lock it down such that the ssh server will not prompt for a password, and the only way to gain access to it via ssh is via the ssh key, which you are guarding with your life ;)
This file is located on the target system at /etc/ssh/sshd_config .
It looks something like this – this example is the default sshd_config file supplied right after installing openssh-server on my Debian Wheezy VM…
# Package generated configuration file# See the sshd_config(5) manpage for details# What ports, IPs and protocols we listen forPort 22# Use these options to restrict which interfaces/protocols sshd will bind to#ListenAddress ::#ListenAddress 0.0.0.0Protocol 2# HostKeys for protocol version 2HostKey /etc/ssh/ssh_host_rsa_keyHostKey /etc/ssh/ssh_host_dsa_keyHostKey /etc/ssh/ssh_host_ecdsa_key#Privilege Separation is turned on for securityUsePrivilegeSeparation yes# Lifetime and size of ephemeral version 1 server keyKeyRegenerationInterval 3600ServerKeyBits 768# LoggingSyslogFacility AUTHLogLevel INFO# Authentication:LoginGraceTime 120PermitRootLogin yesStrictModes yesRSAAuthentication yesPubkeyAuthentication yes#AuthorizedKeysFile%h/.ssh/authorized_keys# Don't read the user's ~/.rhosts and ~/.shosts filesIgnoreRhosts yes# For this to work you will also need host keys in /etc/ssh_known_hostsRhostsRSAAuthentication no# similar for protocol version 2HostbasedAuthentication no# Uncomment if you don't trust ~/.ssh/known_hosts for RhostsRSAAuthentication#IgnoreUserKnownHosts yes# To enable empty passwords, change to yes (NOT RECOMMENDED)PermitEmptyPasswords no# Change to yes to enable challenge-response passwords (beware issues with# some PAM modules and threads)ChallengeResponseAuthentication no# Change to no to disable tunnelled clear text passwords#PasswordAuthentication yes# Kerberos options#KerberosAuthentication no#KerberosGetAFSToken no#KerberosOrLocalPasswd yes#KerberosTicketCleanup yes# GSSAPI options#GSSAPIAuthentication no#GSSAPICleanupCredentials yesX11Forwarding yesX11DisplayOffset 10PrintMotd noPrintLastLog yesTCPKeepAlive yes#UseLogin no#MaxStartups 10:30:60#Banner /etc/issue.net# Allow client to pass locale environment variablesAcceptEnv LANG LC_*Subsystem sftp /usr/lib/openssh/sftp-server# Set this to 'yes' to enable PAM authentication, account processing,# and session processing. If this is enabled, PAM authentication will# be allowed through the ChallengeResponseAuthentication and# PasswordAuthentication. Depending on your PAM configuration,# PAM authentication via ChallengeResponseAuthentication may bypass# the setting of "PermitRootLogin without-password".# If you just want the PAM account and session checks to run without# PAM authentication, then enable this but set PasswordAuthentication# and ChallengeResponseAuthentication to 'no'.UsePAM yes
i) Remove password authentication leaving only public key authentication.
#PasswordAuthentication yes
PasswordAuthentication no
sudo service ssh restart , or sudo /etc/init.d/ssh restart
ssh locked down
ssh-add -D command), then trying to ssh to the target server…ii) Whether to allow root login or not
# Authentication:LoginGraceTime 120PermitRootLogin yesStrictModes yes
PermitRootLogin parameter to no;PermitRootLogin no
PermitRootLogin without-password : this means that root will only be allowed to login via ssh key – nice and secure.PermitRootLogin forced-commands-only : this means that root will only be allowed to login via ssh key as above, AND only if the command option for that particular ssh key has been used. I will cover the command option with respect to ssh keys later in this article. If you want to read that now, click this link to jump to it from here.iii) Change or add ports and addresses that ssh listens on
# What ports, IPs and protocols we listen forPort 22# Use these options to restrict which interfaces/protocols sshd will bind to#ListenAddress ::#ListenAddress 0.0.0.0
Port number to something else – say for example 2222, and the ssh server will only listen on that port, after you restart the ssh service.-p argument in your ssh command, e.g. ssh -p 2222 kcave@192.168.1.254Port entries in the config file, and ssh will listen on them all, for example;Port 22Port 2222Port 443Port 6543
22,2222,443,6543ListenAddress directive. Again, you can specify multiple entries for this, and ssh will listen only on the ones specified. As you can see from the config file, you can specify IPv4 and IPv6 addresses. You can also specify a port to listen on.ListenAddress 192.168.1.254:8765 : ssh would listen on the address 192.168.1.254 , and on the port 8765, so you would issue the command ssh -p 8765 <user>@192.168.1.254 to connect.iv) Firewall side note…
7) Protect your system further by installing fail2ban

Installing Fail2Ban
sudo apt-get install fail2ban[ssh]enabled = trueport = sshfilter = sshdlogpath = /var/log/auth.logmaxretry = 6
action = %(action_)s
destemail = root@localhost
8) And now for the Cool Stuff you can do with SSH!
i) Port Forwarding/Tunnelling
-L option in your ssh command on your client system. The syntax is like this;ssh -L <bindaddress>:port:host:port-on-host <username>@<target ssh server>
<bindaddress> is an optional address on your client system you wish the port to be accessible on. If you omit this address, ssh will expose this port to all active addresses on your client machine. You could for example specify localhost and ssh will bind that port only to the localhost interface on your client machine.port is the port on the local client machine you will connect your RDP client to. This is handy if, for example, you also run an RDP service on your client machine and port 3389 is already taken by that service. You can tell ssh to use port 3390 instead.port-on-host is what port ssh on the target ssh server will listen to, and forward to the port on your client machine (there’s a reason I explain port-on-host before host…)host is where the ssh connection on the target machine will listen to…. this is a pretty cool feature as I’ll explain…host as localhost , then ssh on the target ssh server will listen to the localhost interface on the target ssh serverhost as a different ip address, then ssh on the target ssh server will listen to the port-on-host on whatever system is running on that ip address!Scenario A) Connect to RDP service on system running SSH service…

Scenario A
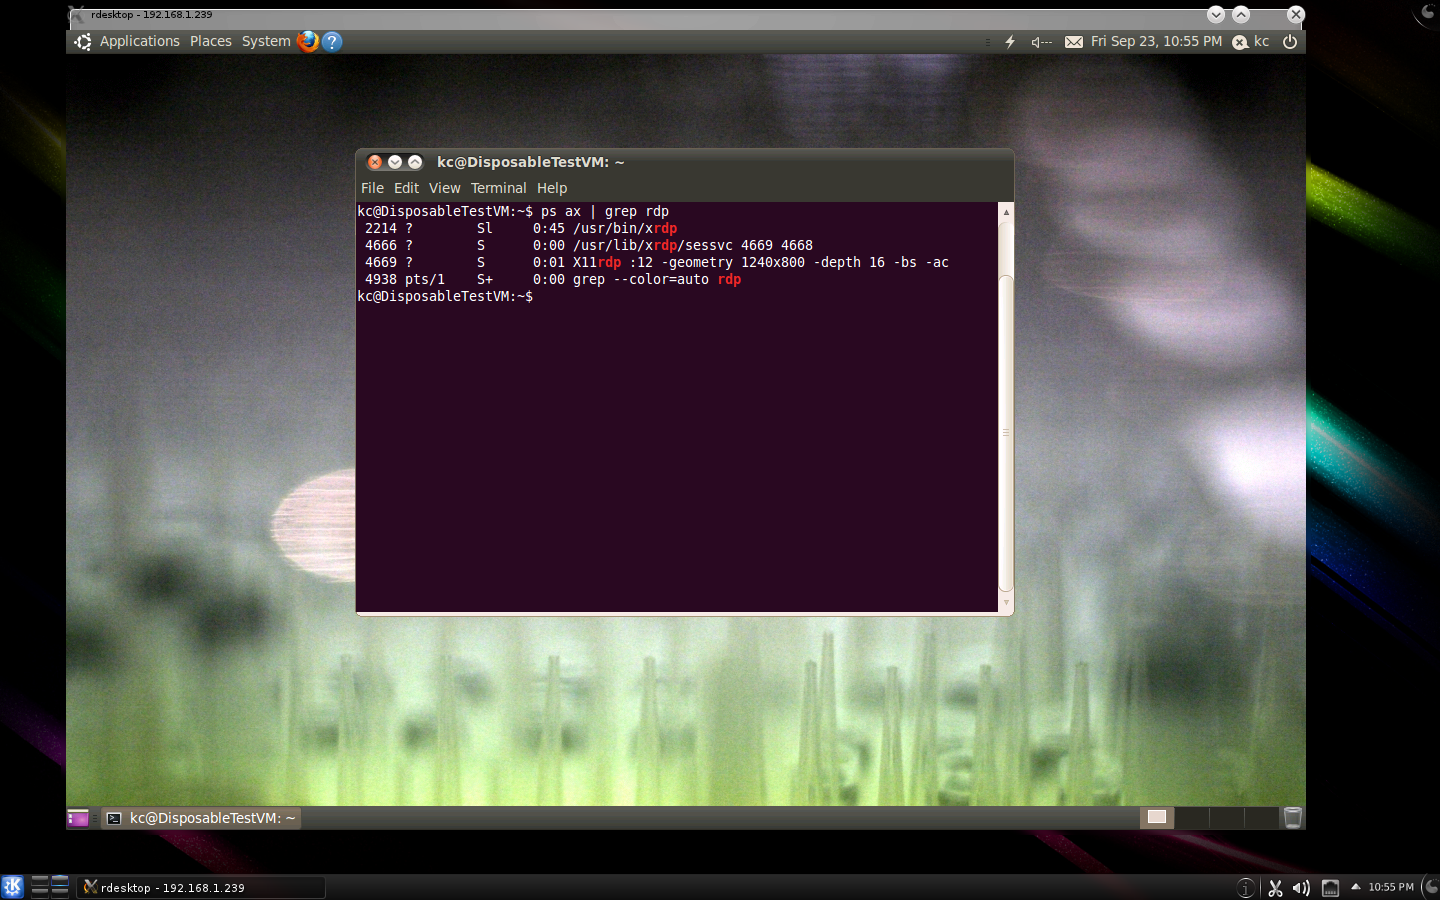
ssh -L localhost:3390:localhost:3389 kcave@192.168.1.254
rdesktop -a16 localhost:3390Scenario B) Connect to RDP service on some other system via target ssh system…

Scenario B
ssh -L localhost:3390:192.168.1.100:3389 kcave@192.168.1.254
rdesktop -a16 localhost:3390Scenario C) Connect to RDP services on various systems via SSH running on target ssh system…

Scenario C
Laughably easy!
ssh -L localhost:3390:192.168.1.100:3389 -L localhost:3391:192.168.1.101:3389 -L localhost:3392:192.168.1.102:3389 kcave@192.168.1.254
Then for each RDP session of the systems in question;
rdesktop -a16 localhost:3390
rdesktop -a16 localhost:3391
rdesktop -a16 localhost:3392
In this scenario, we used one ssh connection to form multiple tunnels!
You can forward ANY port, by the way – this is not just limited to the RDP port. You could, for example, forward to a network printer in an office which is running the LPR service (port 515), so you could print directly from your client system, to that office printer. You could forward to the MySQL development service in your office, on port 3306, for testing and development purposes from your home.
By now, you’ve hopefully gotten the hang of how to tunnel and forward ports using the ssh command on a Linux client system.
But, how do you forward ports if your client system is running Windows?
Jump Back To Index
ii) The equivalent Port Forwarding/Tunnelling via puTTY on Windows
I’ll use the same three scenarios as above….
Scenario A) Connect to RDP service on system running SSH service…
Scenario A

Load the Basic session config

The Tunnels Category
-L localhost:3390:localhost:3389 …
Equivalent in puTTY

Equivalent tunnel now configured

Save Session

Connected with tunnelling active

Configure Terminal Server Client Host and Port

Configure Terminal Server Client Display Properties

Confirm Identity

Success!

Logged in
Scenario B) Connect to RDP service on some other system via target ssh system…
Scenario B
-L localhost:3391:192.168.1.100:3389 kcave@192.168.1.254
Scenario B configuration
Scenario C) Connect to RDP services on various systems via puTTY/SSH running on target ssh system…
Scenario C
-L localhost:3391:192.168.1.100:3389 -L localhost:3392:192.168.1.101:3389 -L localhost:3393:192.168.1.102:3389 kcave@192.168.1.254
Scenario C configured
9) Finally for Part 1 – Optimize the ssh connection for use with RDP
i) Linux cipher setup
ii) Windows/puTTY cipher

Load your session config

Click on the SSH Category
How did that work out for you? Let me know in the comments below!
ssh - Secure your systems with ssh on Linux and puTTY on Windows - Part 1,


Amasing! Clearly and easy to use! Many many thanx!!!!!
Cant’t wait to try all these tricks for ssh tunneling of GUI programms (like firefox) from server to remote Windows clients with Xming and pulseaudio. I hope it will look like be some kind of AppServer)))
Your articles are great!!!
GREAT!!!Many thanks!
Greetings from München, Germany!
[…] Secure your systems with ssh on Linux and puTTY on Windows – Part 1 » Get audio with your xrdp/x11rdp connections, LAN or Remote! By Kevin Cave, on April 6th, […]